
FULLY CONTROLLABLE, ADOPTABLE & ADJUSTABLE
While RigONE sails are designed to reduce gear dependency, they still rely on a specific mast type to achieve optimal sail performance.
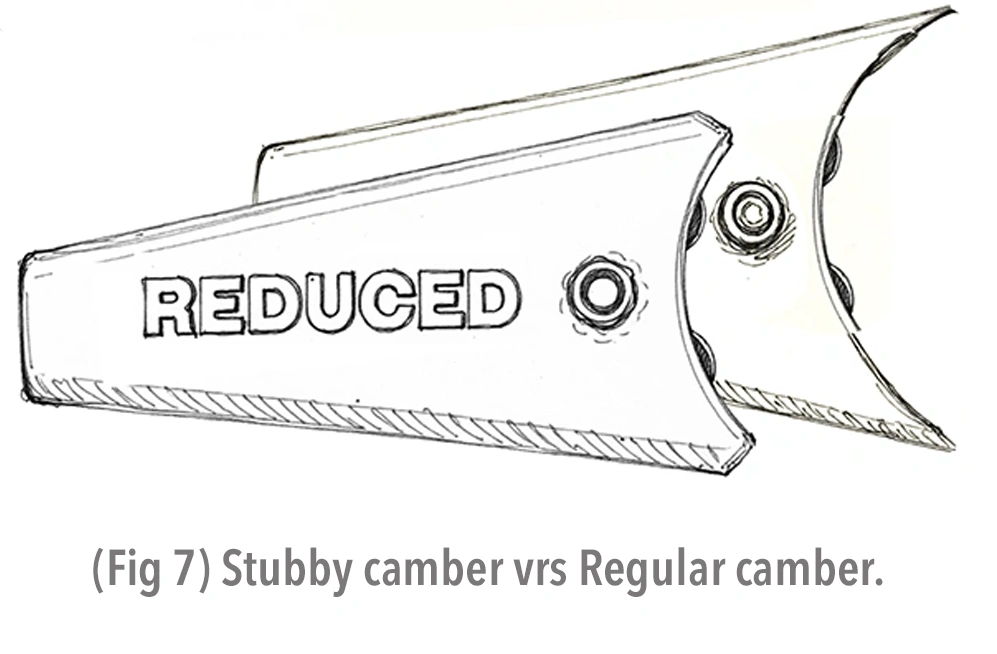
RigONE was built around a constant-curve RDM (Reduced-Diameter Mast). This so-called “skinny” mast plays a major role in our pursuit of shedding drag. The constant-curve bend characteristics of the RDM allow smooth rotation of the two “Stubby” cambers (Fig. 7). These stubby cambers lock in the sail’s draft while remaining user-friendly. There are different bend characteristics among RDM masts on the market. The stubby’s rotation can be perfected simply by grinding short the stubby’s length (See Troubleshoot) to accommodate a flex-top.
The RigONE is designed and fitted on the Windwing ONE 100% carbon constant-curve RDM. Aside from being lighter, the 100% carbon mast is stiffer, with quicker reflexes or bounce-back quality. This stiffness is more consequential than weight. For heavier sailors wanting to go fast, a stiff mast is a must, especially on larger sails. The stiffness of the masts becomes the muscle behind the sail.
The drawback is that a 100% carbon mast breaks more easily than a 90% carbon mast, especially in a hot tropical environment.
It is hard to find a good 490 RDM mast, as few companies stock long RDM masts. More than 25 years ago, Windwing/Gulfteh pioneered the 100% carbon RDM. We will incorporate a compatible mast program with the RigONE package.
RIGGING PROCEEDURES:
1: Traditionally, all Windwing sails are rolled on the starboard side. This is the natural bend characteristic of the materials used in sail-making.
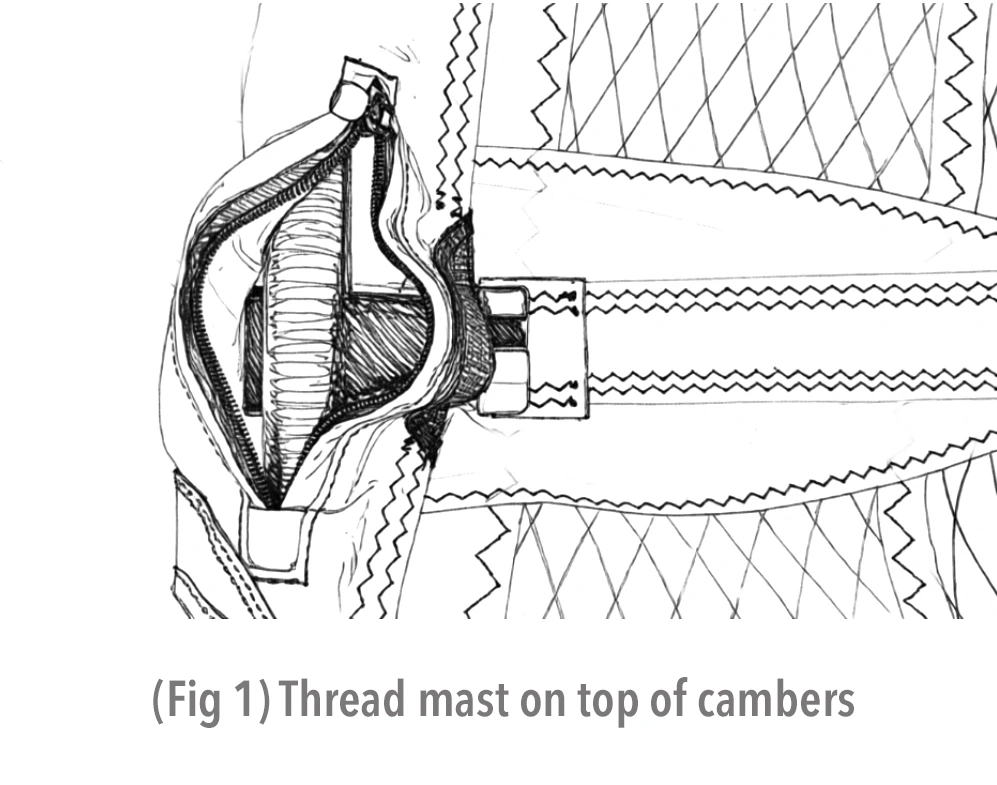
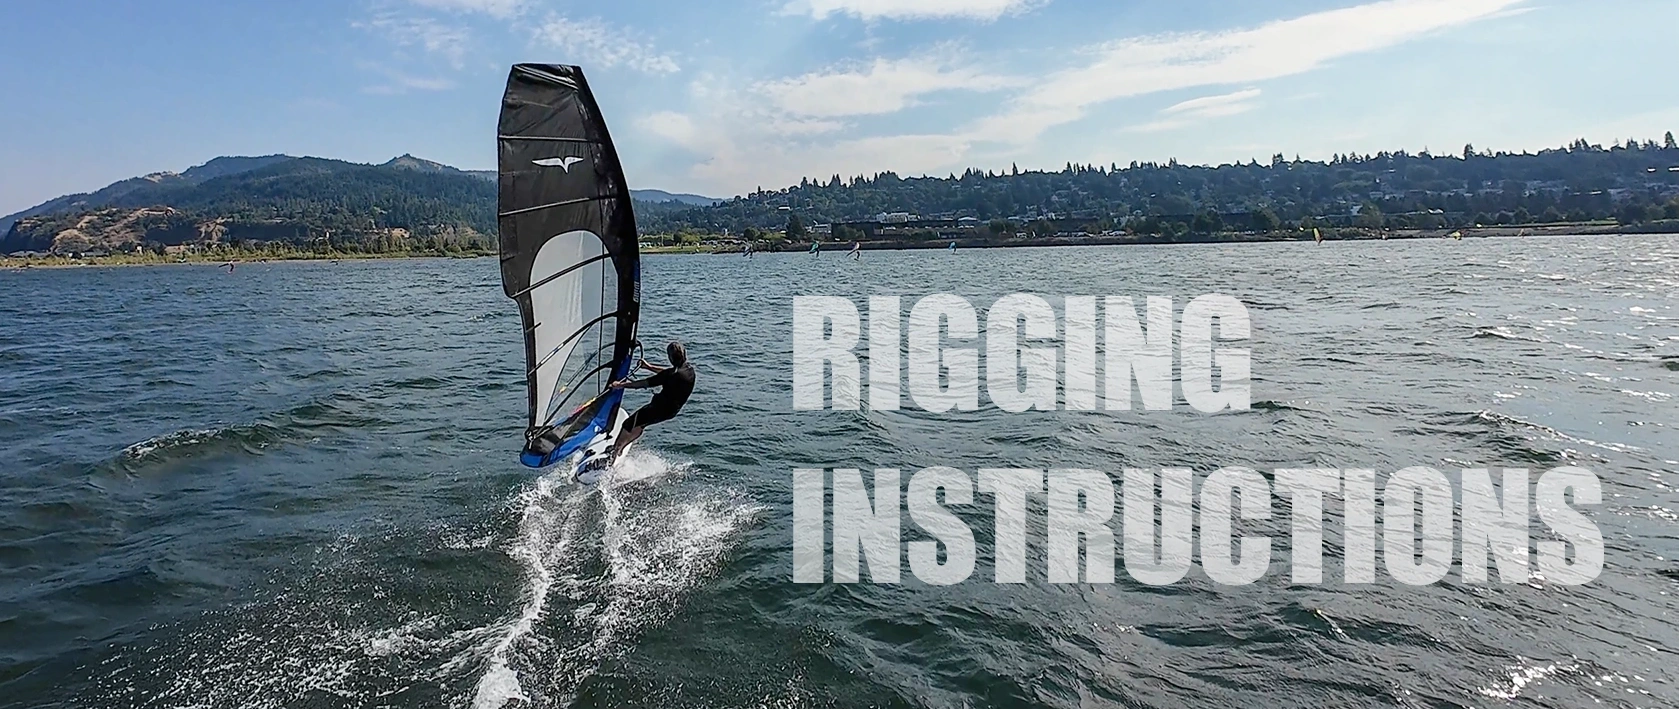
2: Thread the mast into the mast sleeve, making sure to rest the mast on top of the two “Stubby” cambers (Fig 1). Make sure the male mast plug is firmly seated into the mast tip. (Fig 2) When rigging the sail for the first time, ensure the mast plug and mast tip are aligned and firmly connected.
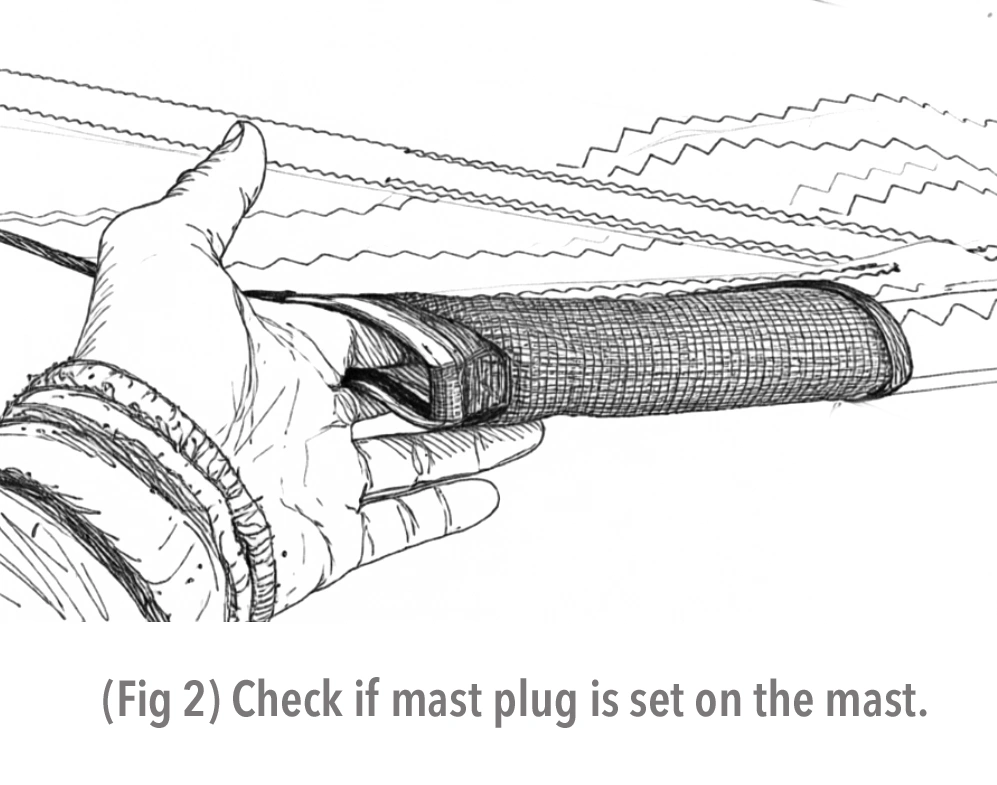
3: Secure the tack pulley to the extension base with moderate tension (Fig 3). Pull enough downhaul tension just to stretch the mast sleeve around the mast. Too much tension at this point will make it difficult to pop the stubby cambers onto the mast.

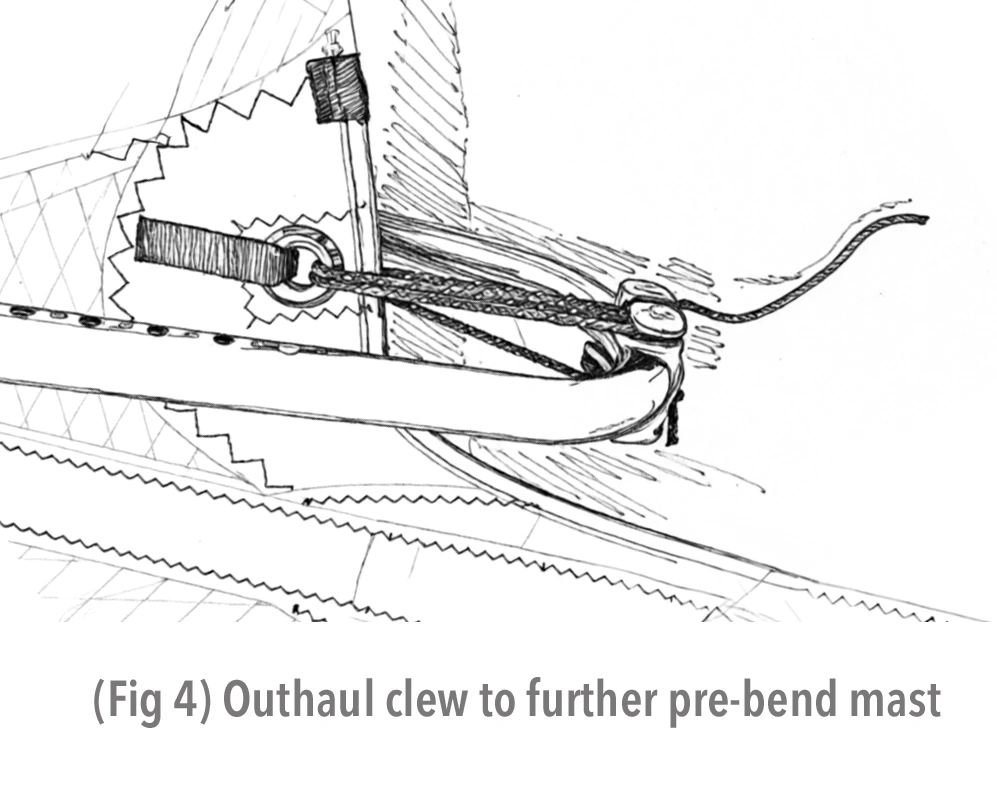
4: Attach the boom close to the base of the boom opening (Fig 5). Go to the back of the boom and pull the clew close to the boom cleat (Fig4). This will flatten out the sail and pre-bend the mast.
5: Go to the boom head, with your palm, press down the batten behind each stubby camber while pushing the stubby into place with your other hand (Fig 6). They are called Stubbys because they have no sides and rely on the mast sleeve to keep them in place (Fig 7). If the Stubby’s will not stay on the mast, increase downhaul tension until the mast sleeve tightens to hold stubbys in place.
6: The more downhaul, the tighter the mast sleeve wraps around the mast and the harder it will be to slip the stubby’s in place. When fully downauled, it will be impossible to pop the stubbys into place.
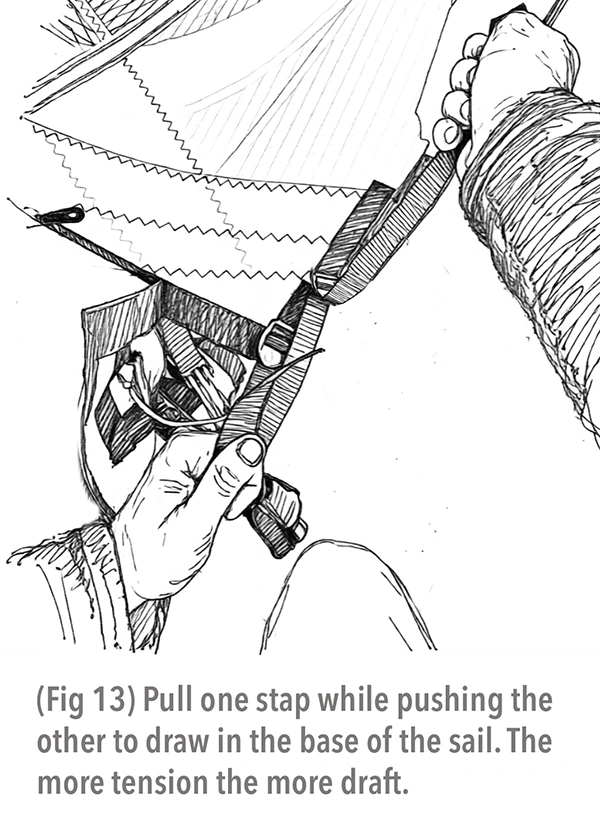
7: Once the cambers are popped in, it’s now time to fully downhaul the sail. The amount of downhaul will depend on the wind strength. The following two visual guides will help determine the amount of downhaul.
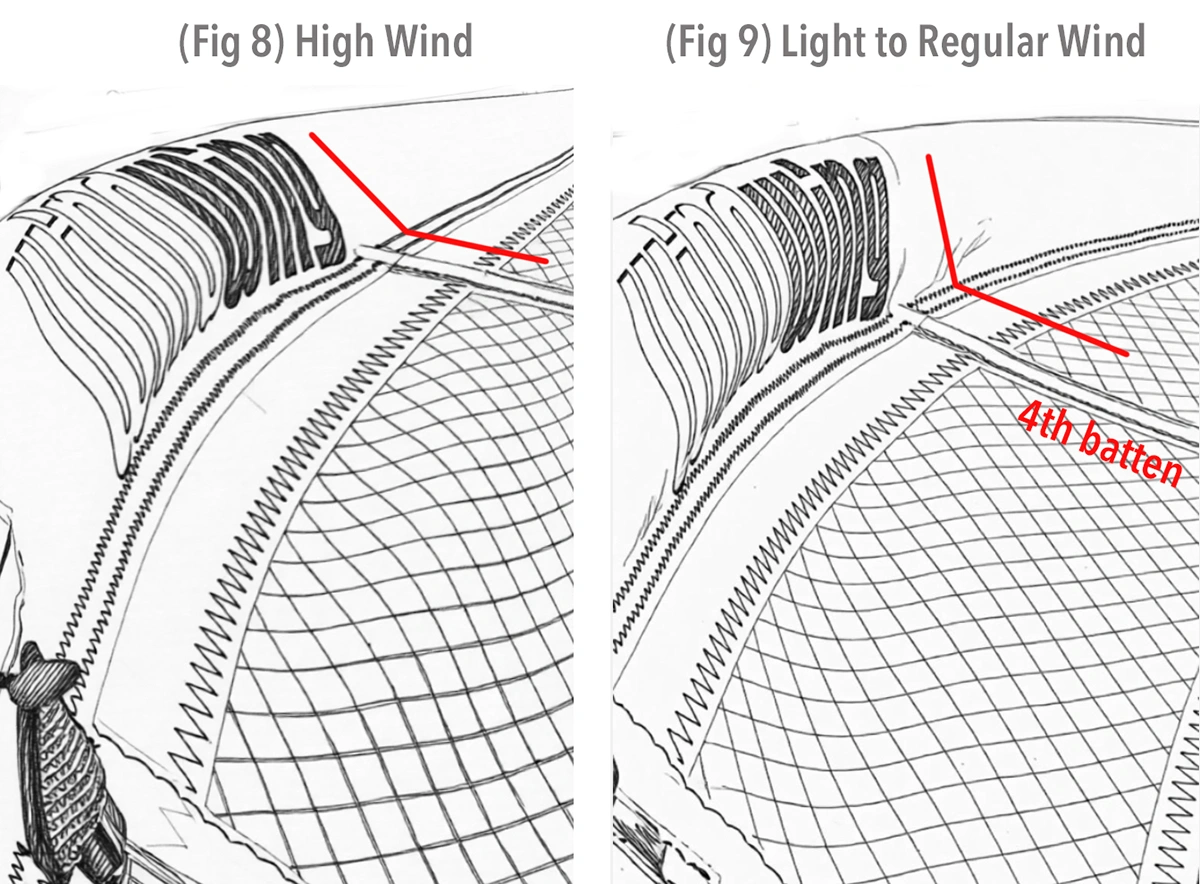
High Wind: Consistently above 25knots: Downhaul sail until the 4th batten sleeve is almost straight out from the mast. (Fig 8) If the wind is not consistently above 25, less downhaul can be used.
Light to Regular Wind: 8-25 knots: Downhaul sail until the 4th batten sleeve is greater than 90 degrees from the mast (Fig 9). The batten tip should always rest away from the mast, but never touching.
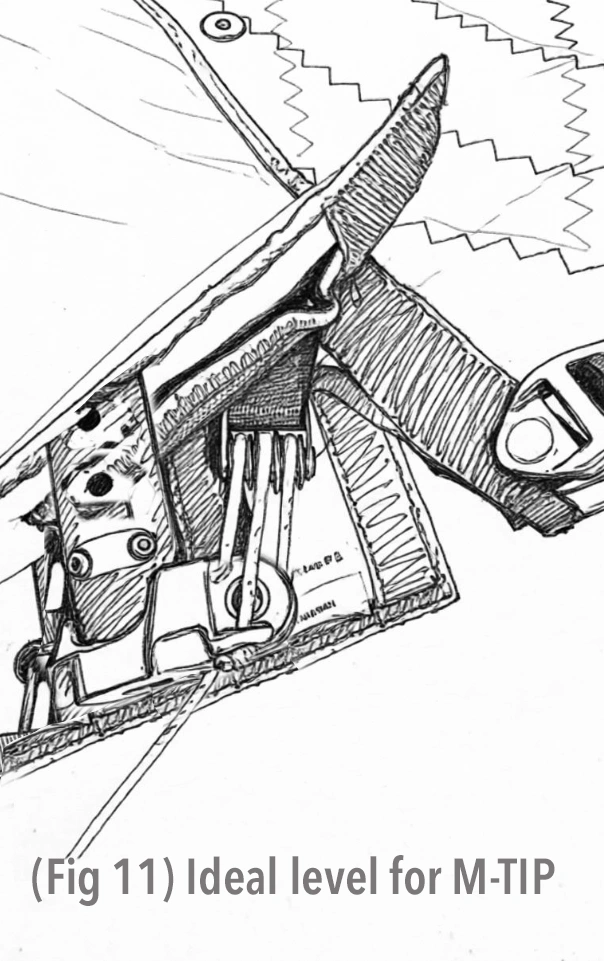
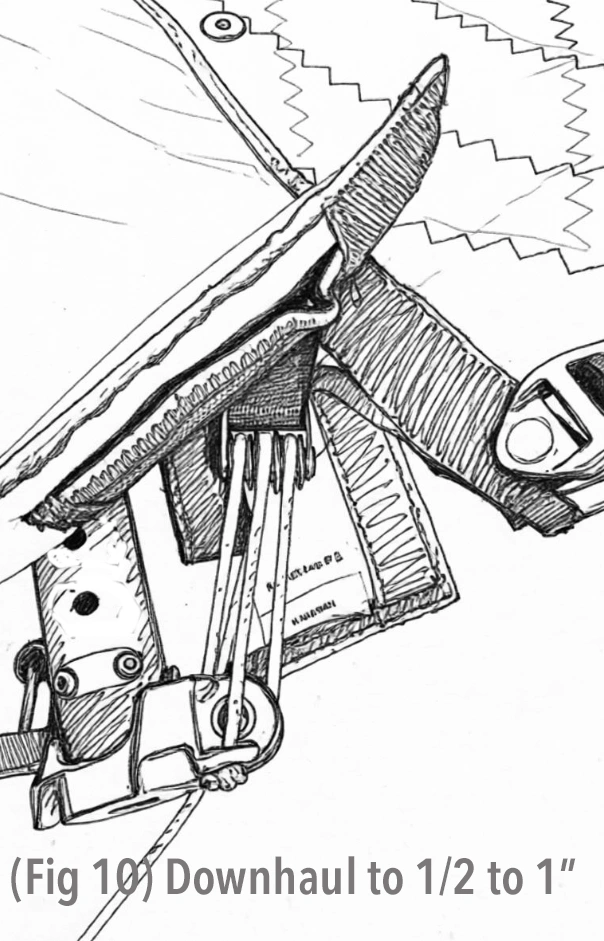 8: Because of the M-TIP (Multi-Tack Inhaul Panel), the final downhaul level should always have approximately an inch of pulley lines exposed. (Fig 10) This is the maximum level at which the M-TIP straps can work effectively. It also means if you’re faced with stronger winds, you can still further downhaul and flatten the sail. Approximately 1/2 inch to zero distance from the base of the extension is the ideal level for the M-TIP (Fig 11).
9: Once the downhaul is set, make sure the clew is free from the boom end and not restricted from contracting when M-TIP is activated.
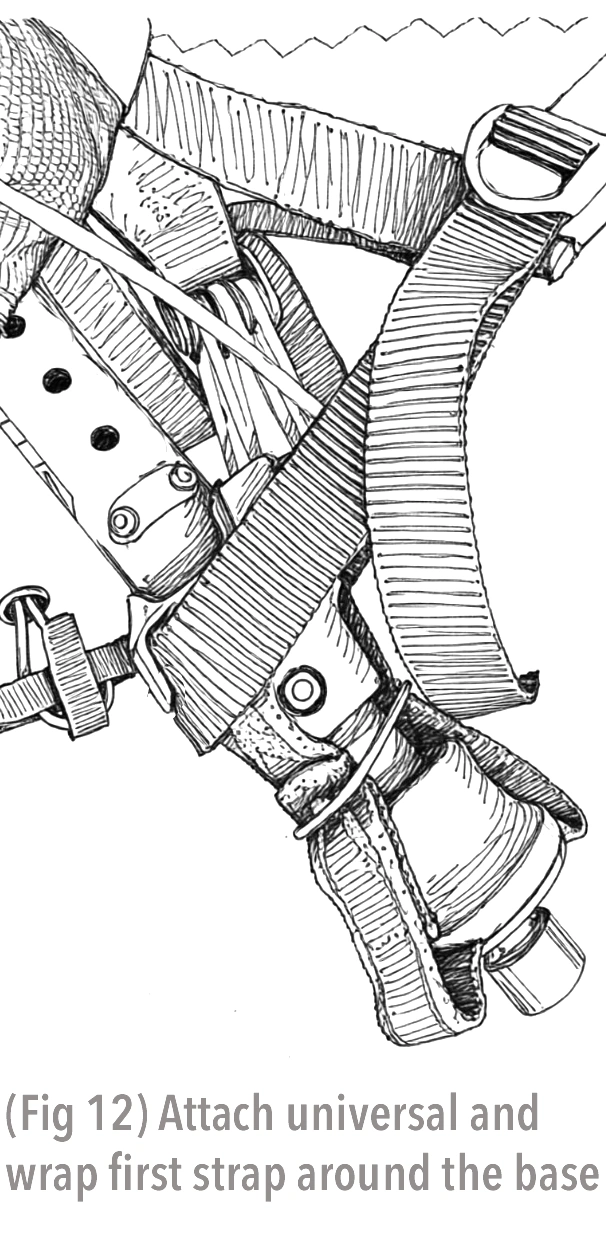 10: Secure the downhaul line and attach the universal. Wrap the first M-TIP’s straps at the foot of the sail around the base of the extension (Fig 12). If using a RigONE extension, you will find a built-in tack strap hook. When using a regular extension, make sure the straps are grasping the edge of the extension and the universal. For those using regular extensions, it is best to have the universal already attached to the extension.
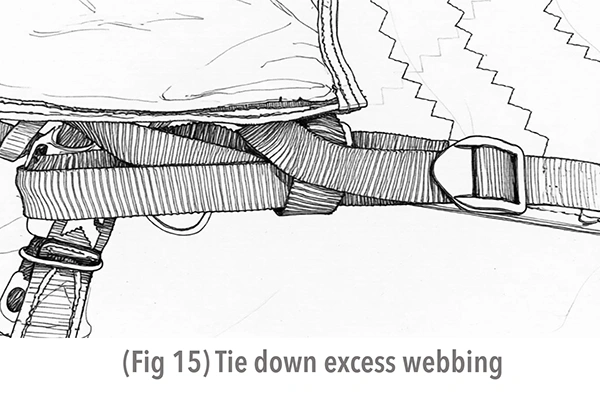
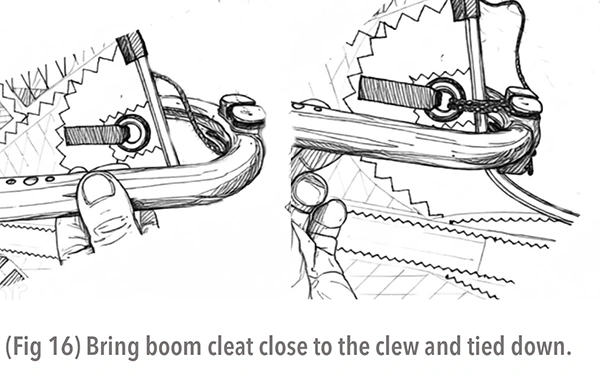
12: Secure the residual straps into the foot pad or tie them down out of the way (Fig 15). Go to the clew and secure the boom to it with slight tension (Fig 16). This is used to secure the boom to the sail rather than tensioning the clew to the boom.
13: Go to the front of the boom and adjust the height of the boom head. It should be noted that the boom operating position of the RigONE sails can be lower than that of other sails. This is because the M-TIP brings power below the boom and minimises drag above the boom; there is no need to have the boom high to leverage against the sail.
14: Once you sail the RigONE, you will feel the relaxed comfort of the sail. It is fast and efficient without a fight. In fact, the more relaxed and upright the operator stands, the faster the sail goes. Having the boom lowered also means the sailor can hook into the harness lines sooner and more easily. In addition, there is no need for longer harness lines.
TROUBLE SHOOTING
Sail Feels Heavy: Not enough downhaul.
Sail Feels Gutless: Too much downhaul and not enough M-TIP tension.
Camber Will Not Stay On The Mast:
When a camber (usually the bottom one) slips off to the side and is wedged between the mast and the sleeve, performance suffers considerably. You should always fix this before resuming sailing.
Quick Solution: More downhaul. Usually, larger sails, rigged for maximum draft, may have the camber slide out due to insufficient downhaul. Once you increase the downhaul, the camber will stay in place.
Long-Term Solutions: Slip the Stubby camber off the batten, and insert the camber spacer on the batten and reinsert the camber. Spare camber spacers come in the sailbag along with a batten tensioner tool.
YOU!
The crazy, the misfit,
the troublemaker,
the round peg in a square world,
the windsurfer they can’t ignore because your sail… changed things.
![]()
Secure Your Spot
Early production availability, exclusive pricing, insider updates.
Limited sails available